How To Include Your Dog In Your Engagement Photos
The Ultimate Guide To Bringing Your Dog To Your Engagement Session
Welcome to this photographer’s guide to including your dog in your engagement photos! As a dog owner that happens to be a wedding and engagement photographer, I understand two very crucial concepts:
1) You want to include your beloved companion in your session.
2) The one time your dog is not a perfect angel sent straight from heaven is when the cameras are out.
Let’s look at some steps you can take to prep your dog, and yourselves, so that your engagement session goes without a hitch!
Teach a “Focus” Command
In the weeks before your engagement session, you’ll want to set yourself up for success! Getting your dog to look in the correct direction, especially at a camera, can be a super difficult task. The dog likely hasn’t met the photographer before, and the size and shape of a large professional camera pointed at them could be a bit stress-inducing for the pup. Quite often, if the dog does end up looking at the camera, you’ll see them with an averted gaze, ears pinned back, scratching, or licking their lips - all signs of minor stress and the dog attempting to calm the situation
Ideally, every dog will look at and focus on their owners when their name is called. Unfortunately, that’s not always the case. We humans tend to say our dogs’ names frequently, and they become conditioned to that sound and can learn that it doesn’t always mean something important! That’s why a “Focus” command is a great tool to have! It’s a cue that you can use that the dog is expected to regularly complete and it’s rewarded frequently, too. This way, you can use the phrase during the session if the photographer wants the dog to look at you, or the photographer can use the command when it’s time for the dog to look at the camera.
Here’s how to teach a focus command. During the dog’s regularly scheduled mealtimes, when they’re expecting food, ditch the bowl a few times per week. Instead, use their regular food and put it in a training pouch or similar slobber-proof container. Just make sure it’s easy to access the food and deliver it rapidly!
If you’ve done any formal training with your dog in the past, you’re probably familiar with the concept of a verbal marker and a reward. In dog training, a “marker” is an indicator to the dog that, in that exact moment, they’ve done something correctly. The “reward” is anything that the dog enjoys - food in this case. You’ll be speaking the verbal marker at the exact moment your dog does what you want, so choose a word that’s easy to say excitedly! Most people, including myself, choose the word “Yes!”
So, for your first session, grab your food, put your dog on a lightweight leash and simple collar, and find a quiet place in the house to do your first session. I like to sit in a chair when teaching this!
Sit down and keep the leash in one hand
Your dog may be confused at first and may try and walk away or sniff around, that’s okay! Just let that happen. You want to get those problem-solving juices flowing.
Keep an eye on the dog, but don’t say a single word. Just gently keep them in your vicinity with the leash.
The exact moment your dog looks at you in the eyes, calmly (but in a fun voice) say “Yes!” and deliver food to the dog. This is the first win!
Do this 3-4 more times, each time immediately marking (Yes) and rewarding simply when the dog looks at you.
On the last repetition, let the dog have the rest of the food after the final successful eye contact. You can dump the rest of the food on the floor as a huge jackpot, or simply continue feeding the remainder of the food by hand.
That’s your first session! Do this multiple times a week (or for every meal if you’re determined and the dog is motivated) in many rooms in the house. You may find your dog freely offering eye contact throughout the day. If this happens, keep treats nearby so you can always mark (Yes!) and reward that good behavior!
Now, to add the actual command! Now that the dog has the concept of, “eye contact is AWESOME” down to a science, it’s time to layer your command over that behavior. The steps are very similar to your first session:
Quiet room, leash in hand, sitting calmly on a chair. Let’s say your dog’s name is Moose for this example. 🤣
Wait for your dog to stop paying attention to you. A slight glance away or sniffing the ground is enough!
When they aren’t making eye contact with you, say “Moose, Focus!” Don’t say anything else and do not repeat the command. The moment they make eye contact, say your marker word and reward heavily!
Similar to phase 1 above, repeat only a few more times for your first session. They should catch on super quick if you’ve laid a solid foundation! The string of events will always be: “Focus!” > Dog makes eye contact > Say marker word > Deliver reward. You’re taking something that the dog is already familiar with, eye contact, and saying, “Hey. I like when you do that. Can you do that after I say this specific word?”
This is THE most important step out of all the other steps. For this to really take hold, you need to do these sessions at a variety of locations, times of day, and - importantly - with different people. With your partner, your friends, your parents, coworkers, etc… We need to get the dog to understand that when someone says “Moose, Focus!” that they are to lock eyes with that person to unlock delicious rewards.
If you want to really amp up your dog’s attention, vary the rate of your rewards and the type of reward, once the concept is nailed down. Once in a while, wait a few seconds until you give your marker, and only give the marker and reward if they HOLD that eye contact. Reward sometimes with a single piece of food, and sometimes with a whopping handful. Sometimes they get a piece of chicken, other times a normal piece of food. Have fun with it! Just make sure that the dog, and you, have fun and that you keep the training sessions relatively short (under 15 minutes in the beginning).
At the end of this process, your dog should be able to Focus on your eyes, and other peoples’ eyes, on command in a few different locations. If you’re consistent and your dog is decently motivated, this should really only take 2-3 weeks to build a really solid Focus command!
Choose A Familiar Location
We got the hard, and most important part, out of the way! Now, it’s time to plan your engagement session. With all my clients, I always ask if there are specific locations that they like or that are special to them. If you’re wanting to include your dog in your engagement session, take your dog’s familiar locations into account.
Try and pick a location that they’ve been to before, but one that doesn’t always mean extreme stimulation. For instance, a small park that you go on calm walks in regularly is a great place, but the dog park or their favorite fetch spot is less than ideal. Dogs are great at pattern recognition, and if they recognize that they’re at the dog park or a spot where they regularly do high-intensity exercise, it’ll be really difficult to maintain their focus during the session. Excitement and stress hormones will start coursing through their veins before you even get out of the car!
In short, try to pick a spot that they’ve been to before, but not one that’s associated with crazy intense activities. The back corner of a park, a wooded trail, or a historic city neighborhood are all fantastic potential choices!
Exercise Your Dog Beforehand
If your dog hasn’t gotten much physical or mental stimulation on the day of the shoot, it’s a great idea to knock off that top layer of energy with something fun and engaging. Be careful, though, as you don’t want to overwork the dog! An overtired pup is just as difficult to work with as an understimulated pup. They’re literally just toddlers with big pointy teeth and tails - you can’t convince me otherwise!
If you need ideas for what to do with your dog that’ll calm them physically and mentally, here are some things I love doing with my two herding-breed dogs!
Structured walking - I love going on a “structured walk” with my dog. This requires your dog to be able to walk on a loose leash, but it’s so worth it. Throughout the walk, I encourage the dog to engage and disengage with me at various times. We stop and sit, we climb on obstacles, I tell them to “Go Sniff!” or “Go Potty!”, and we just generally explore and play together while keeping their focus on me and how fun I am. This concept will translate well when it comes time for the session
Trick training - Using their regular mealtimes to go over their tricks is a great activity. Even if it’s just sit, focus, and lie down, the repetition and mixing up the order of commands is super mentally exhausting. Split the meal between you and your partner and trade-off calling the dog between the two of you for a super exhausting way to practice their recall.
Tug - This is my absolute favorite game by an unfathomable amount. Sage, my oldest dog, loves tug and has a really great bite, so we play this regularly! Switching between tugging, dropping the toy, and completing commands is extremely rewarding for her!
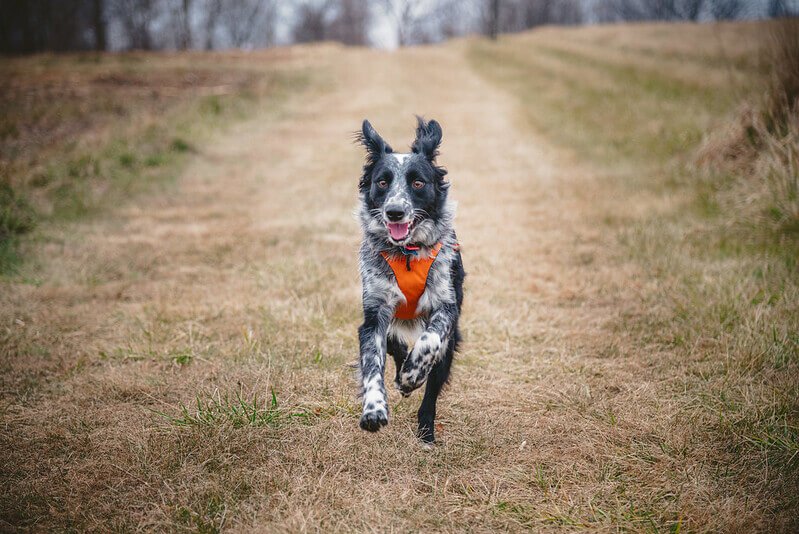
Sage, our first dog! She’s half Blue Heeler, half Border Collie, so she’s got the drive to play!
Glacier, our younger pup. Half Blue Heeler, half Aussie Shepherd. He’s less drivey and more cuddly!
Choose The Right Reward
The dog’s favorite treats are an easy win to bring to the session, but food is not the only thing you can use to motivate your dog! Any command that is rewarded with a piece of food or a treat can also be rewarded with a toy or even just a gentle touch. If your dog is unlikely to take food from your hand during the session, but may opt for a toy, bring both just in case!
For toys, I recommend something that they, of course, love playing with, but that isn’t associated with playing fetch. As mentioned before, a fetch toy will more than likely amp the dog up way too much. Additionally, fetch is an outwardly rewarding game, meaning that the reward is sent away from the owner for the dog to chase after. It’s not the game you want to play when you want photos of you and your dog together!
Squeaky toys or tug toys are the perfect choice to bring to your session, as they’re still a great reward for the dog but don’t indicate that a big long game of “run away and come back” is going to take place. 😉
Arrive 15 Minutes Early
When you’re loading up to drive to your first location, plan to arrive a few minutes early, between 15 and 30 minutes, ideally. When you get there, keep the dog on leash.
Find a quiet place in a lower-traffic area close to the parking lot where you can sit and let your dog decompress. If they’re anything like my dogs, a good sniff check is needed right after getting out of the car to assess the situation and familiarize themselves with the environment. A park bench is perfect for this! Sit down and just let the dog decompress after getting out of the car.
For my clients, I’m typically arriving at the session locations 30 minutes early anyways. This allows their dogs time to sniff me out and for me to establish myself as something that’s really no big deal! After a few minutes of hanging out, the dog is typically bored of me or on to something more interesting, which is the perfect time to begin the session!
Keep Gear To a Minimum
Even if you normally walk your dog in a bright harness, jacket, booties, collar, and a big leash, I encourage you to keep your dogs’ gear to a minimum! A collar, a 6-ft black or different dark-color leash, and a cute bandana (if that’s your jam) are all that you really need.
If you’re on private property and can trust your dogs off-leash, that’s a great opportunity to get some photos of the dogs just playing and being dogs! However, if our session is in a public area, we have to abide by the local leash laws. In this case, it’ll be much easier to hide a simple dark-colored leash behind the dog for posed photos, and it won’t be distracting for photos of you two walking the dog.
Have An Exit Strategy
If you’re anything like my couples, you’ll want a majority of the session to be about capturing you and your partner. I recommend we limit the dog-inclusive photos to maybe the first 20 minutes of the photoshoot. After that, it’s best to either safely contain the dog for the rest of the photos or get a family member to take the dog home. Here are some strategies that I recommend for getting your dog safely off-location so you two can enjoy the rest of the session…. UNLEASHED! Get it?…….
Drop the dog off at your home: If the first location for your session is less than 5 minutes from your home, it’s pretty simple to just take the pup back to its stomping grounds! This will also give you the opportunity to change clothes, should you want to do an outfit change.
Contain your dog in your car: This is a great option, but only under certain circumstances. If your dog is ok being contained in the car away from you and you know they won’t hurt themselves when alone, that’s great! The other stipulation is that you all should stay within eyesight of the vehicle and the air conditioning should probably be left on, especially in the spring and summer. If your session and location can check all those boxes, this could be a great option!
Get a friend or family member to take the dog home: This is the most popular option! Convince a friend or family member to take the dog to your house or their house for the remaining session time. Typically, pizza or alcohol is a suitable method of compensation here!
Even if you’re only able to manage a couple of these tips, I assure you, after having done well over 100 of these engagement sessions, you’ll have a far more enjoyable time with your dog during the shoot! If you’re engaged and still need some amazing photos, let’s chat! I’d love to get to know you two (or three)!


